We had a great visit with Ryan's parents, and made two new dishes while they were here! Ryan doesn't really love dessert, so on Father's Day we asked my father-in-law what he would like for to have at the end of the meal. Well, as any great grandfather does, he knows his audience! He picked an ice cream sundae cake and the kids were thrilled! It was easy to put together and definitely was delicious!
Later in the week we made a chicken dish that was fabulous! Chicken Scaloppini - originally clipped from a newspaper years ago my mother-in-law has been making it for a long time and she shared it with us. I am glad she did, because the dish was a hit and we'll be making this again!
I'm heading out of town with the kids for a few weeks, so don't be surprised if the next two weeks I don't publish the blog. But don't worry - I'll be back! And of course, you just never know if I do make a new dish while we are away!
New Dishes
Ice Cream Sundae Cake
Luna's Chicken Scaloppini
Friday, June 22, 2012

Luna's Chicken Scaloppini

Ingredients
* 2 small yellow onions,
diced fine
* 4 tbs unsalted butter
* 1/2 cup brown sugar
* 1/2 cup Worcestershire sauce
* 2-4 boneless, skinless
chicken breasts
* Flour for dredging
* 2 tbs unsalted butter
* 2 cloves garlic, minced
* 2 cups mushrooms, sliced
* 1 cup artichoke hearts, diced
* 1/2 cup white wine
* 1/2 cup chicken stock
* 1/4 cup lemon juice
* 1/2 cup heavy whipping cream
* 1/2 cup marsala wine
* 1/4 cup fresh basil,
chopped fine
* Salt and pepper to taste
Directions
1. In saucepan over medium heat,
saute onions in 4 tablespoons butter until light golden brown. Add brown sugar
and cook until completely melted. Add Worcestershire sauce and simmer until all
liquid is absorbed. Set aside.
2. With meat mallet, pound chicken breasts to 1/4-inch thickness. Cut each
breast into 3 pieces.3. In large saute pan, melt 2 tablespoons butter. Dredge chicken in flour and add to pan. Cook over medium heat until lightly browned. Turn chicken and add garlic, mushrooms, artichoke hearts and reserved onions. Saute about 2-3 minutes over high heat.
4. Add white wine, chicken stock and lemon juice. Bring to a boil and reduce liquid for 2-3 minutes. Add cream and marsala and continue to reduce until sauce reaches desired thickness, about 5 minutes.
5. Before serving, add fresh basil and salt and pepper to taste.
Notes
This is one of my father-in-law's favorite recipes! When my in laws were visiting this week we made it one night, and it was a hit with the kids and adults. My mother-in-law originally clipped this from her local newspaper years ago!
Ice Cream Sundae Cake
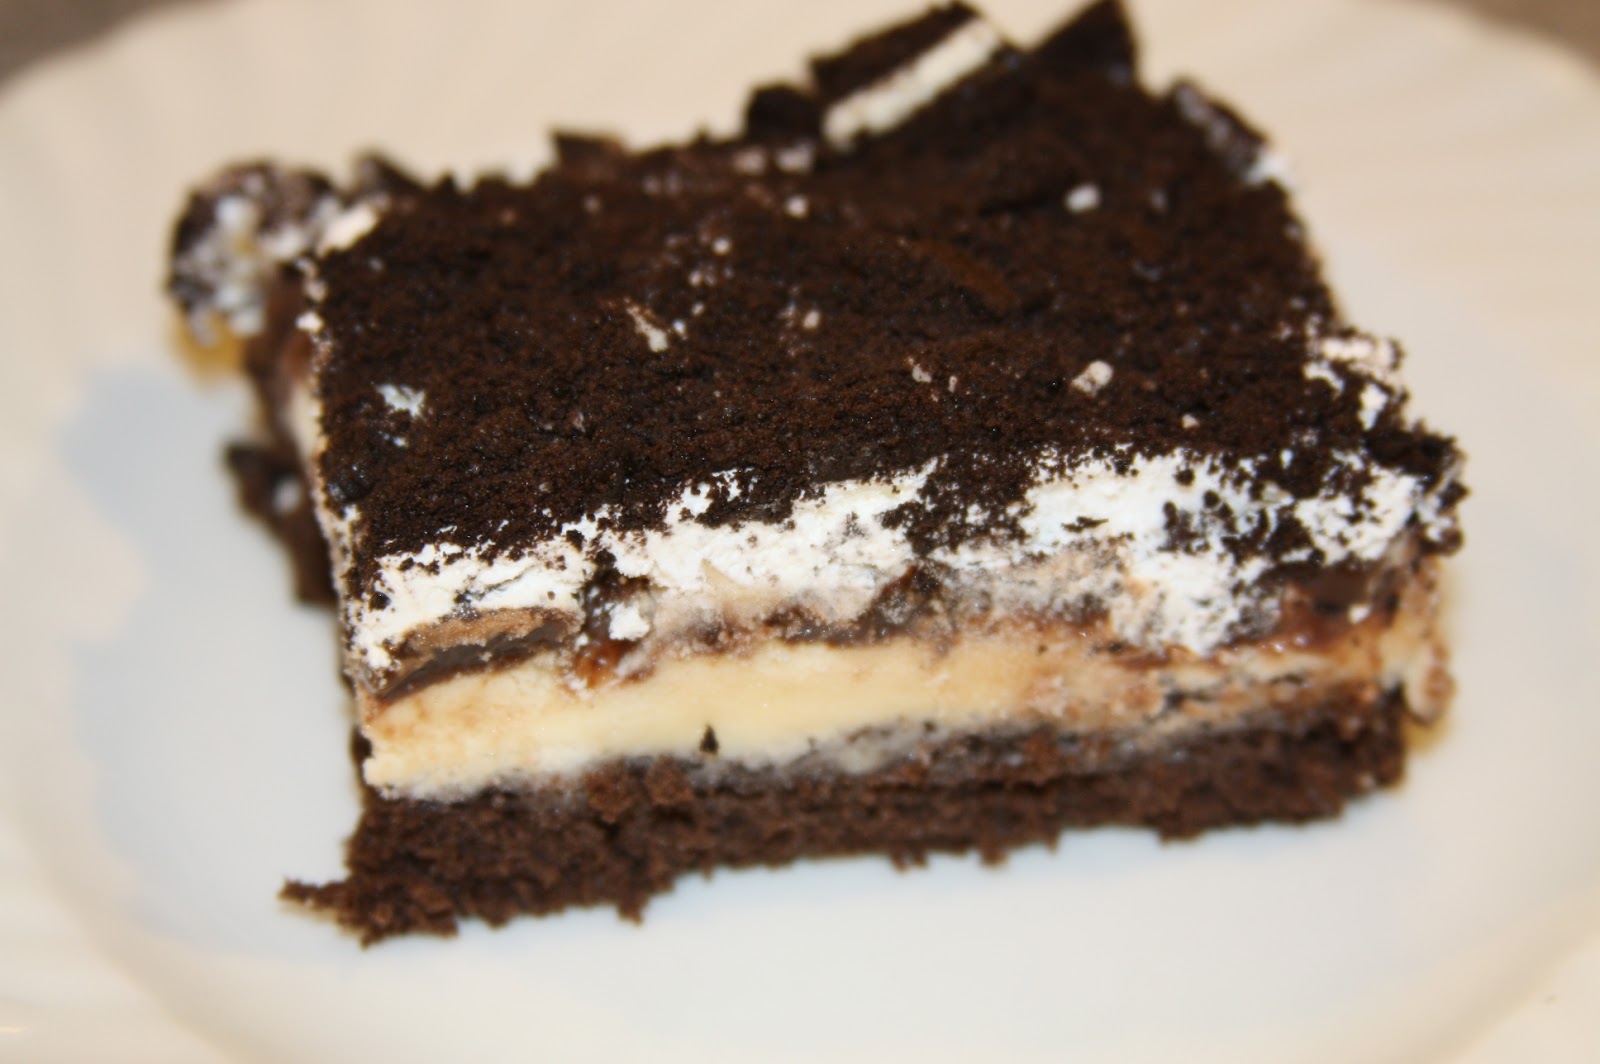
Ingredients
* 3 eggs, separated
* 1/2 cups sugar, divided
* 2/3 cups all-purpose
flour
* 1/4 cup baking
cocoa
* 3/4 teaspoon baking
powder
* 1/3 cup water
* 1/2 teaspoon vanilla
extract
* 1/2 gallon vanilla
ice cream, softened
* 1 jar hot
fudge ice cream topping, warmed
* 3/4 cup chopped
salted peanuts
* 1 carton frozen whipped topping,
thawed
* 8 cream-filled
chocolate sandwich cookie crumbs
Directions
- In a bowl, beat egg whites until foamy. Gradually beat in 1 cup sugar until stiff peaks form; set aside.
- In another bowl, beat egg yolks until thick and lemon-colored, about 2 minutes. Gradually beat in remaining sugar; beat 2 minutes longer.
- Combine flour, cocoa and baking powder; add to egg yolk mixture alternately with water. Beat in vanilla. Gently fold in egg whites.
- Transfer to a greased 13-in. x 9-in. baking pan. Bake at 350° for 16-20 minutes or until a toothpick comes out clean. Cool on a wire rack.
- Spread the cake with ice cream. Drizzle with fudge
topping; sprinkle with peanuts. Spread with whipped topping; sprinkle with
cookies. Cover and freeze until firm. Remove from the freezer 15 minutes
before serving.
Notes
At first I thought I would just use a box cake mix for this recipe, but in the end decided since I had all the ingredients on hand I would just go ahead and follow the recipe. I am glad I did! The consistency of the cake part of the dessert was a cross between a brownie and a cake, and it held up well to the freezing. So, ignore the urge to use a box cake mix and go ahead and follow these directions!
Also, when the cake comes out of the oven, it will be really high, and then sink as it cools, so don't be surprised when that happens!
Friday, June 15, 2012
June 15, 2012
We tried two new things this week; one was a hit, and one was okay. First, the hit: taco pasta. While not a meal you will likely be serving to company (unless of course your guests are all under the age of 8), it is very easy to put together and you likely have all the ingredients on hand. The only thing I didn't have was the cream, and was tempted to use milk, but in the end I didn't stray from the ingredients list. Milk probably would work, and I bet half and half would too, but the cream helped melt the shredded cheese (I think!). Let me know if you try it and use milk - I'd love to know how it turned out!
Only "alright" was a lemon blueberry breakfast roll for which I had high hopes! Owen and I thought it was okay, but not quite lemon-y enough. The filling all melted out of the rolls, but my non-blueberry lovers were rather happy with that fact! All in all, I tossed this recipe.
Summer vacation is off to a great start! We didn't have time to try too many things, but we did look through a few recipes from my bin and tried to pick out some things to try over the next few weeks. We'll see what is voted a keeper!
New Recipe
Taco Pasta
Only "alright" was a lemon blueberry breakfast roll for which I had high hopes! Owen and I thought it was okay, but not quite lemon-y enough. The filling all melted out of the rolls, but my non-blueberry lovers were rather happy with that fact! All in all, I tossed this recipe.
Summer vacation is off to a great start! We didn't have time to try too many things, but we did look through a few recipes from my bin and tried to pick out some things to try over the next few weeks. We'll see what is voted a keeper!
New Recipe
Taco Pasta
Taco Pasta

Ingredients
* 1 lb. ground beef
* 1 taco seasoning packet
* 1 1/2 cups salsa
* 1/2 cup water
* 1/2 - 3/4 lb. pasta
* 2 cups grated cheddar cheese
* 1/4 cup heavy cream
* salt & pepper, to taste
* 1 lb. ground beef
* 1 taco seasoning packet
* 1 1/2 cups salsa
* 1/2 cup water
* 1/2 - 3/4 lb. pasta
* 2 cups grated cheddar cheese
* 1/4 cup heavy cream
* salt & pepper, to taste
Directions
1. Bring water to boil to cook the
pasta as directed on the package.
2. While the pasta is cooking, in a
large skillet, cook ground beef, breaking apart as you go. Once thoroughly
cooked, drain meat and then place back on heat. Add taco
seasoning, salsa and water. Simmer until pasta is finished cooking.
3. Once pasta is cooked, drain well and
pour into ground beef mixture. Top with cheese, cream, salt and pepper. Stir until cheese
melts and noodles are coated in sauce. Serve immediately.
Notes
While this is certainly not Sunday dinner fare, it was a big hit at our table, and very quick to put together! So, next time you have kids running to and from sports practices and adults racing to evening meetings, perhaps give this a try! We paired it with spinach salad and everyone was satisfied.
Friday, June 8, 2012
June 8, 2012
After Hannah picked such a delicious and successful meal last week, Owen wanted a turn. So he began flipping through the same cookbook that she found her recipe in and he came across Grilled Beer Can Chicken. He proudly walked the recipe over to Ryan and I and asked if we could make it. Of course!
We'd made beer can chicken before, but not with a spice rub. In the past we'd simply put a chicken on a nearly full can of beer and grilled it. This particular recipe from Cook's Illustrated called for a spice rub and the addition of bay leaves to the beer. I must admit - it was very tasty! Good job picking this one out, Owen! It's a keeper!
With school having let out earlier this week, we haven't been too adventurous in the kitchen yet. So far we've just been enjoying the schedule-free days and enjoying the beautiful stretch of weather we've been fortunate to have. But, perhaps this coming week we'll try out a few new things.
Happy Cooking!
New Recipe
Grilled Beer Can Chicken
We'd made beer can chicken before, but not with a spice rub. In the past we'd simply put a chicken on a nearly full can of beer and grilled it. This particular recipe from Cook's Illustrated called for a spice rub and the addition of bay leaves to the beer. I must admit - it was very tasty! Good job picking this one out, Owen! It's a keeper!
With school having let out earlier this week, we haven't been too adventurous in the kitchen yet. So far we've just been enjoying the schedule-free days and enjoying the beautiful stretch of weather we've been fortunate to have. But, perhaps this coming week we'll try out a few new things.
Happy Cooking!
New Recipe
Grilled Beer Can Chicken
Grilled Beer Can Chicken (for gas grill)

Ingredients for Spice Rub
* 1/2 cup paprika
* 2 tbsp kosher salt
* 2 tbsp garlic powder
* 1 tbsp dried thyme
* 2 tsp ground celery seed
* 2 tsp pepper
* 2 tsp cayenne pepper
Directions for Spice Rub
Mix all the ingredients in a bowl.
This mix will keep in an airtight container for up to 3 months.
Ingredients for Grill Roasted Beer Can Chicken
* 12 oz can of beer (your choice of flavor/brand)
* 2 bay leaves
* 1 whole chicken (3.5 to 4.5 lbs)
* 3 tbsp of the spice rub
Directions for Grill Roasted Beer Can Chicken
1. Open the beer, and drink (our pour out) a few ounces. Leave yourself with 8 -10 ounces of beer in the can.
2. Punch 2 additional holes in the top of the beer can, giving the can a total of three holes.
3. Crumble the bay leaves and add them to the beer.
4. Pat the chicken dry with paper towels, and run it with the spice rub both on top of and under the skin.
5. After applying the rub to the chicken, poke the chicken with holes using a skewer or sharp fork.
6. Slide the chicken onto the beer can so that the chicken is now standing upright.
7. Preheat your grill for about 15 minutes. You should keep your grill at about 325 F.
8. Clean and oil the cooking grate of your gas grill, and place the chicken (on the can) in the center of the grill. Cover the grill and cook for 1 to 1.5 hours. The chicken breast should register 160 F, and the thighs should register 175 F.
9. Remove from grill, tent with foil and let the chicken rest for 15 minutes.
10. Lift chicken off the can, carve the bird and serve. Enjoy!
Notes
I am sure you can do this on a charcoal grill as well, but we did it on our gas grill. What a moist, juicy, and flavorful chicken this was! We all enjoyed it, and we used the leftovers in quesadillas later in the week. The spice rub creates quite a bit, so you might want to cut the recipe in half to begin with; you will still have more than the 3 tablespoons you need for this meal.
Subscribe to:
Posts (Atom)